he Company Administrator have the possibility to create new users based on their company's portal access. Administration of users is done in 'Maritime Access Management' tool located as a tile in Veracity - My Services or by link from the portals.
In Maritime portals, there are three different user types available to choose from:
- User
- Administrator
- Vessel user
Create a user either with full access to all vessels, projects or services, or with access limitations
A user will by default get access to all vessels, projects and services based on your company's portal access.
A user can be set up with limitations by removing access to vessels, projects or services. Users with limitations will not inherit access rights to new projects, vessels, or services, with one exception: a user with limited access to projects will automatically gain access to new alteration projects on vessels to which the user already has access.
Click 'Create new user' in the 'Users' view.
By default, the user will get full access rights (not administrator rights), but limitations can be set by deselecting vessels, projects and services in the 'Create new user wizard'
- 'Setup'. fill in:
- Login email and choose user type
- Click Next
- 'User details, fill in:
- Contact email
- First name
- Last name.
- Description field is not mandatory, but can be filled in if needed.
- If a date is selected in the Expiry box, the user becomes a temporary user, and the account is disabled after the selected date.
- Click Next
- Vessel access (for Ship Owners and Managers):
- For limitations (as described above), deselect relevant vessels
- Click Next
- 'Project' access (for Ship Owners, Managers, Yards and Designers):
- For limitations (as described above), deselect relevant projects
- Click Next
- 'Services and feature' access:
- For limitations (as described above), deselect relevant services
- Click Next
- Confirmation:
- Please review user details and access. It is possible to do corrections by clicking ‘Edit’ or go back to previous steps. Press the "Create User" button to confirm.
Note an administrator can:
- Make changes to users access rights at any time in the 'User details'.
- A new user can be created with same access rights as an existing user by using the copy user functionality.
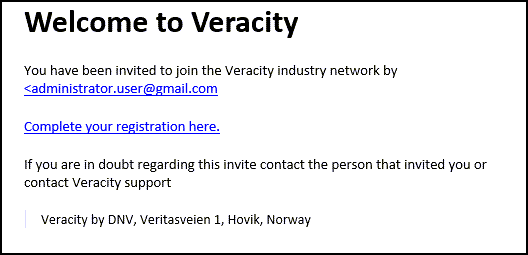
If this is a new Veracity user, an email will be sent from the system with a link to confirm the email address and to set the password.

Create a user - Administrator user
A user defined as an administrator has access to all vessels, projects and services. The user administrates other users.
Click 'Create new user' in the Users view.
In the 'Create new user' wizard choose 'Administrator' as user type.
- 'Setup', fill in:
- Login email and choose user type
- Click Next
- 'User details', fill in:
- Contact email
- First name
- Last name.
- Description field is not mandatory, but can be filled in if needed.
- If a date is selected in the Expiry box, the user becomes a temporary user, and the account is disabled after the selected date.
- Click Next
- 'Services and features' access:
- Under 'Services and features', you can grant or remove access to Fleet features (only available for 'Fleet Status' portal users).
- Click Next.
- 'Confirmation':
- Please review user details and access. It is possible to do corrections by clicking ‘Edit’ or go back to previous steps. Press the 'Create User' button to confirm.
If this is a new Veracity user, an email will be sent from the system with a link to confirm the email address and to set the password.
Note: You may create a new user with same access rights as an existing user by using the copy user functionality.
Create a user - vessel user
The user has access to one specific vessel and the account is managed by the company administrator, including setting of password. This user type is typically used by vessel crew.
Click 'Create new user' in the Users view.
In the 'Create new user' wizard choose 'Vessel' as user type.
- 'Setup', fill in:
- Login email and choose user type
- Click Next
- 'User details', fill in:
- Contact email
- First name
- Last name.
- Description field is not mandatory, but can be filled in if needed.
- If a date is selected in the Expiry box, the user becomes a temporary user, and the account is disabled after the selected date.
- Click Next
- 'Vessel access':
- Choose the correct vessel in the list
- 'Services and features' access: :
- Under services, you can limited services access for the vessel user in the dropdown menu beside each service. Click Next.
- 'Confirmation':
- Please review user details and user access. It is possible to do corrections by clicking ‘Edit’ or go back to previous steps. Press the 'Create User' button to confirm.
Note: Registration of the user must be completed through the registration email. This email was sent to the administrator that initiated the creation of the user.
It is possible to resend the email to a user that hasn't been activated yet (only available for Company Administrators):
- Navigate to the 'Maritime Access Management tool'
- Open the user details
- Click on 'Actions'
- Click 'Fix Veracity login'


